
A Canva brand kit is a centralized hub inside Canva where you store all your essential brand elements—your color palette, brand fonts, logos, and even custom graphics. Think of it as your brand’s home base.
Instead of manually selecting colours or searching for fonts every time you design, your brand kit puts everything one click away. Your visuals stay consistent across Pinterest, Instagram, blog graphics, and email headers—without you having to think about it.
It’s the difference between winging your branding and actually having a system that works.
Pin this post for later 👇
Why Every Blogger Needs a Canva Brand Kit
Having your entire brand visual identity accessible in just a few clicks? Here’s why I think every blogger should have their brand kit set up in Canva.
1. Brand Consistency Without the Mental Load
When your blog graphics, social media posts, and email designs all look cohesive, people start recognising your content instantly. A Canva brand kit makes consistency effortless because your brand identity lives in one organised place.
2. Faster Content Creation (We’re Talking Hours Saved)
Stop starting from zero. With your brand fonts, colours, and logos already loaded, you can design a month’s worth of Pinterest pins in one afternoon. Repurposing content becomes seamless when your system does the thinking for you.
3. Professional Design—Even If You’re a Canva Beginner
You don’t need to be a graphic designer to create polished visuals. Your Canva brand kit ensures every design reflects your brand voice and aesthetic, so you look like a pro from day one.
How to Set Up Your Canva Brand Kit (Step-by-Step Guide)
Setting up your brand kit in Canva couldn’t be easier! Here’s how to get started…
Step 1: Access Your Brand Kit
First, you’ll need Canva Pro to unlock the full brand kit features (trust me, it’s worth it). Here’s how to get started:
- Log in to your Canva account
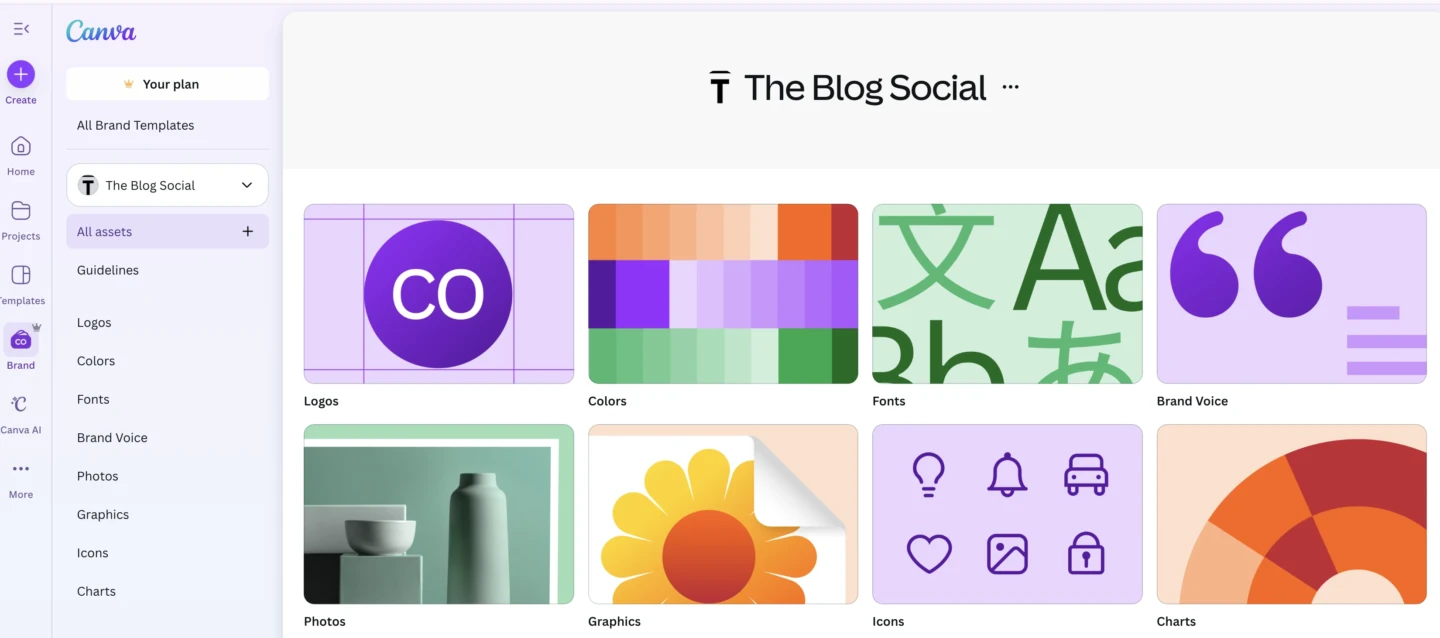
- Click on “Brand Kit” in the left sidebar (or go to Settings → Brand Hub)
- You’ll see sections for logos, colours, and fonts
If you don’t have Canva Pro yet, you can still organise brand elements manually—but the brand kit makes it infinitely easier.
Step 2: Upload Your Logos
Your logo is the foundation of your brand identity, so let’s get it loaded first:
- Click “Upload a logo” in the Brand Kit section
- Upload your primary logo (PNG with a transparent background works best)
- Add any secondary logos—like an icon version, wordmark, or alternate colour variations
Pro Tip: Upload both light and dark versions of your logo so you can easily place them on different backgrounds.
Now, whenever you’re designing, your logo is right there in the “Brand” tab—no more digging through your downloads folder.
Step 3: Set Your Brand Colours
Your colour palette is what makes your content instantly recognisable. Here’s how to lock it in:
- In the Brand Kit, click “Add brand colours.”
- Enter your hex codes (those 6-character colour codes like
#F5A623) - Save 3-5 main colours and 2-3 accent colors
Where to Find Your Hex Codes:
- Use a colour picker tool like Coolors or Adobe Color
- Grab hex codes from your existing website or logo file
- If you’re starting fresh, choose colours that reflect your brand vibe
Once saved, your brand colours appear at the top of every colour palette in Canva. One click, and you’re using the exact right shade every time.
Step 4: Choose and Set Your Brand Fonts
Fonts are where a lot of bloggers get tripped up. Here’s the simple formula:
- 1 headline font (bold, eye-catching)
- 1 body font (clean, readable)
- 1 accent font (optional—use sparingly for emphasis)
How to Add Brand Fonts:
- In your Brand Kit, click “Set brand fonts.”
- Choose your heading and body fonts from Canva’s library
- If you have custom fonts, upload them (Canva Pro lets you upload up to 500 custom fonts)
Canva Font Recommendations:
- Headlines: Montserrat, Raleway, Playfair Display
- Body: Open Sans, Lato, Poppins
- Accent: Pacifico, Satisfy (use sparingly)
Now every design defaults to your brand fonts—no more scrolling through 800 options trying to remember which one you used last time.
Related: How to Apply Your Brand Colors in Canva
Step 5: Organise Brand Templates
Here’s where your Canva design system really starts saving you time. Create master templates for every type of content you produce:
- Pinterest pins (standard 1000×1500 and long-form 1080×1920)
- Instagram posts and carousels
- Blog post featured images
- Email graphics and headers
- YouTube thumbnails (if you’re creating video content)
How to Create a Brand Template:
- Design your graphic using your brand kit colours, fonts, and logos
- Click “Share” → “Template link” → “Save as template”
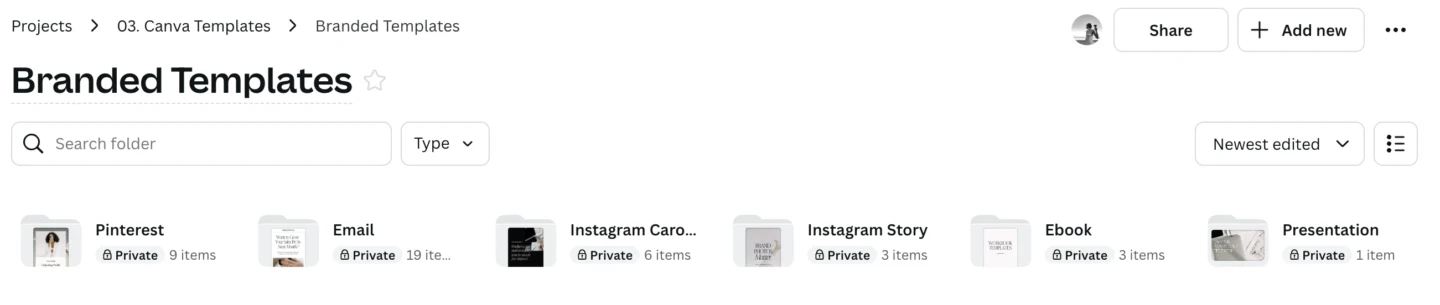
- Name it clearly (like “Pinterest Template – Blog Post”)
- Store it in a dedicated folder
When you need to create new content, just duplicate your template and swap the text or images. Done in minutes, not hours.
Step 6: Save Reusable Brand Elements
This is the secret sauce for batching content like a boss. Create and save these elements once, then reuse them forever:
- Styled text boxes with your brand fonts and colours
- Graphic frames and borders
- Icon sets that match your aesthetic
- Background patterns or textures
- Shaped graphics (circles, rectangles, organic shapes)
Store these in a “Brand Elements” folder so you can grab them anytime you’re designing.
How to Use Your Canva Brand Kit (Workflow Tips)
Access Your Brand Kit While Designing
When you’re working on any design in Canva:
- Look for the “Brand” tab in your left sidebar
- Your logos, colours, and fonts are all right there
- Click to apply—no searching, no guessing
Apply Brand Colours in One Click
Instead of manually selecting colours:
- Select any element (text, shape, background)
- Click the colour box
- Your brand colours appear at the top—click and done
Use Brand Fonts as Defaults
Your brand fonts automatically appear at the top of the font menu. Just click the text box, and your heading or body font is ready to use.
Resize Content for Multiple Platforms
Created a graphic you love? Use Canva’s resize feature (Magic Switch in Canva Pro):
- Click “Resize” at the top of your design
- Select the new dimensions (Instagram post → Pinterest pin)
- Canva automatically adjusts your design to fit
Repurposing content across platforms has never been easier.
Canva Brand Kit Tips and Hacks
Here are some Canva tips to help you set up your brand kit in Canva for you to easily access all your brand assets and brand style guide without costing you hours a week!
Create a Brand Colour Palette Before You Start
If you’re building your brand from scratch, spend time getting your colours right. Use tools like:
- Coolors.co for palette generation
- Adobe Color for colour theory
- Pinterest for brand inspiration
Test your colours together before committing—they should work well on both light and dark backgrounds.
Upload Logo Variations for Flexibility
Don’t limit yourself to one logo file. Upload:
- Full logo (horizontal)
- Stacked logo (vertical)
- Icon/symbol only
- Wordmark only
- Light and dark versions
This gives you options when designing different layouts.
Organise Your Canva Files with Folders
Create a folder structure that makes sense:
- Brand Kit & Templates
- Blog Graphics
- Pinterest Content
- Instagram Content
- Email Assets
Use clear naming conventions like “Pinterest – Blog Post Template” or “IG Carousel – How-To.”
Batch Your Content Using Templates
Set aside time once a week (or month) to create all your graphics in one session:
- Open your master template
- Duplicate it for each piece of content
- Swap text and images
- Export all at once
With your brand kit setup, batching becomes fast and focused—not draining.
Canva Brand Kit Checklist
Before you call your setup complete, make sure you have:
✅ All logo variations uploaded
✅ Brand colours saved with accurate hex codes
✅ 2-3 brand fonts set (headline + body + optional accent)
✅ Master templates created for every content type
✅ Reusable brand elements saved and organised
✅ Clear folder structure with logical naming
✅ A batching schedule to maximise your system
Common Canva Brand Kit Mistakes to Avoid
Using Too Many Fonts
Stick to 2-3 fonts max. More than that, and your brand starts looking chaotic instead of cohesive.
Not Saving Hex Codes
If you don’t use exact hex codes, your “brand blue” will be slightly different every time. Save yourself the headache—lock in those codes.
Related: 7 Free Canva Apps to Level Up Your Designs
Skipping Template Creation
Templates are where the time-saving magic happens. Don’t just design one-off graphics—build templates you can reuse forever.
Forgetting to Organise Files
A messy Canva account wastes time. Set up folders from day one and stick to your naming system.
Real Talk: This Changes Everything
Here’s what happens when you actually set up and use your Canva brand kit:
- You stop second-guessing every design decision
- Your content looks professional and cohesive across every platform
- Batching 20 Pinterest pins takes an hour instead of an entire day
- People start recognising your graphics before they even see your name
You’re not just saving time—you’re building a brand that sticks.
Your Next Step: Set It Up This Week
Stop letting inconsistent branding and time-consuming design hold you back. Block off two hours this week to set up your Canva brand kit properly.
Start with your colours and fonts, upload your logo, and create one master template. Then watch how much faster your next content batch goes.
Your blog is your business—let’s treat it like one.
Want to design even faster? Grab my Canva Keyboard Shortcuts guide and speed up your workflow with shortcuts that’ll make you feel like a Canva pro.