




Quick Answer: You can change all fonts in Canva at once by swapping the font in one text box, then clicking “Change all”.
- Click any text box that uses the font you want to replace.
- Pick a new font from the font dropdown in the top toolbar.
- Click Change all in the pop-up that appears. Every text box using the old font updates, across every page.
- Want a full font makeover instead? Use Design > Styles to apply a matching heading and body font combo in one click.
- Both methods work on a free Canva account.
You finish a 12-slide carousel. You step back, sip your coffee, and realise the font you picked at 11pm looks less “quietly premium” and more “ransom note”. 💀
So you start clicking. Text box one. Text box two. Slide three has four of them. By slide six you’re questioning every life choice that led you here.
Here’s the good news, friend: you never need to change fonts in Canva one text box at a time again. Canva has a built-in way to change all fonts in Canva at once, and a second method that restyles your whole design in a single click. I’ll show you both, when to use each, and how to fix it when the “Change all” button goes missing.

How to Change All Fonts in Canva at Once
The fastest way to change all fonts in Canva is the “Change all” button, which replaces one font everywhere it appears in your design. It keeps your sizes, colours and spacing exactly as they were, and only swaps the font itself, which is why it’s the safest option for finished designs.
Prerequisites: a Canva design with text in it. That’s it. No Canva Pro needed.
- Select one text box that uses the font you want to get rid of. Any page works.
- Open the font dropdown in the toolbar at the top of the editor (it shows the current font name).
- Choose your new font. Only the selected text box changes at this point, and that’s normal.
- Click “Change all” in the pop-up that appears. Canva replaces that font in every text box, on every page of the design.
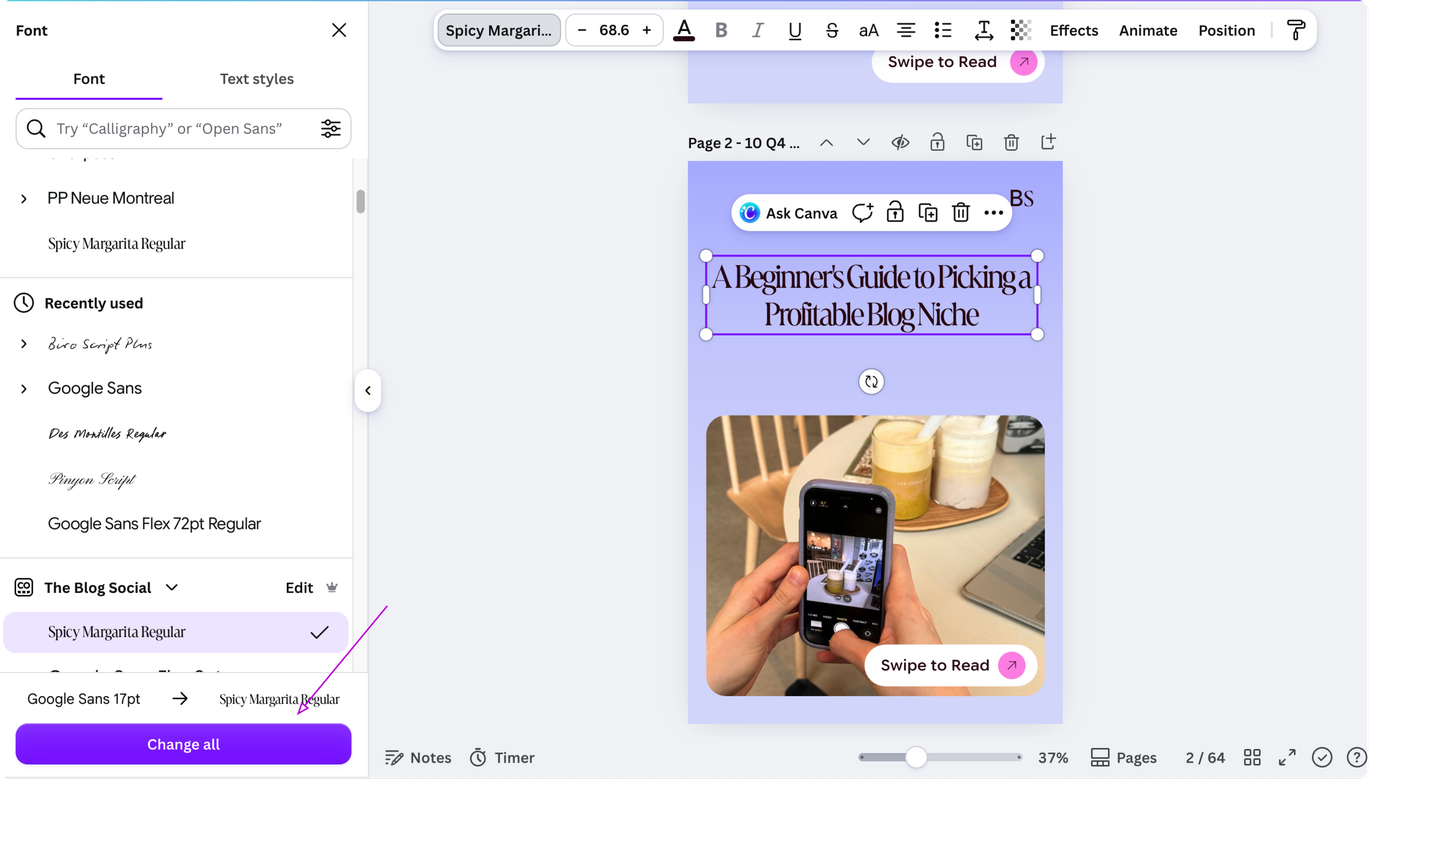
This matters more than it sounds. A 10-slide carousel with 4 text boxes per slide is 40 separate font changes done by hand, or 1 click with Change all. Multiply that by every template you reuse and you get hours back each month.
One thing to know: Change all swaps one font at a time. If your design uses a heading font and a body font, repeat the steps once for each.
Related: The Best Creative Canva Font Pairings to Elevate Your Brand
How to Change Fonts in Canva With the Styles Tab
The Styles tab changes your heading, subheading and body fonts together, using a ready-made font combination. It’s the better choice when you want a whole new look, not just one font swapped out.
- Click “Design” in the left-hand side panel.
- Open the “Styles” tab and scroll to the font combinations.
- Click a combination to apply it. Click again to cycle through variations of it.
- Apply it to every page using the “Apply to all pages” option, so page two doesn’t end up in a different font era than page one.
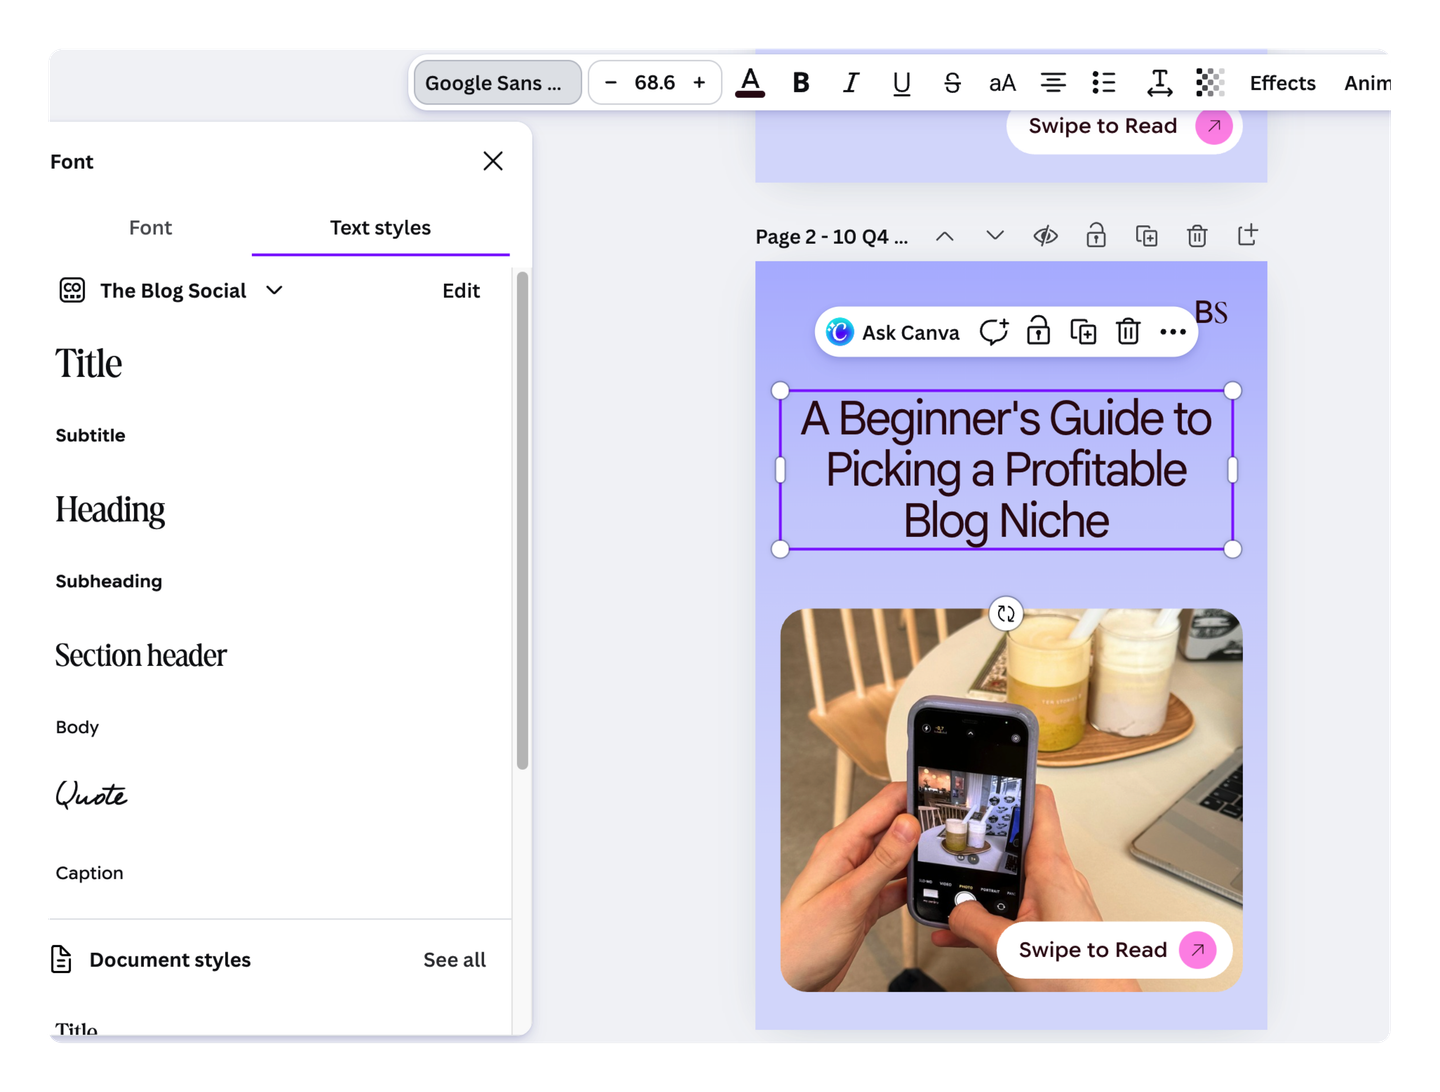
Styles work because Canva already knows which text is a heading and which is body copy, so it can apply a matched pair in the right places. The trade-off: it can nudge sizes and spacing, so give your design a quick vibe check afterwards. ✨
Change All Fonts vs Styles vs Brand Kit: Which One to Use
Use Change all for quick fixes, Styles for a full font makeover, and Brand Kit when you want the same fonts on every design you ever make. Here’s how they stack up:
| Method | What it changes | Best for | Plan |
|---|---|---|---|
| Change all | One font, everywhere it’s used | Fixing a font choice on a finished design | Free |
| Styles tab | Heading, subheading and body fonts together | A fresh look for a whole template | Free |
| Brand Kit | Saves your brand fonts to reuse in any design | Consistent branding across everything you make | Canva Pro (to upload your own fonts) |
If you’re batching content every week, Brand Kit is the top-shelf option because your fonts are set once and ready in every new design. Change all is still the fix you’ll reach for most, because it tidies up the designs you’ve already made.
Related: How to Build a Canva Brand Kit in 4 Easy Steps (No Design Skills Needed)
Why the Canva “Change All” Button Isn’t Showing Up
The Change all pop-up only appears right after you pick a new font, and only when that font is used in more than one place. If you missed it, here’s the fix:
- It disappeared too fast. The pop-up doesn’t hang around. Undo (Ctrl/Cmd + Z), pick the font again, and click Change all straight away.
- The old font is only used once. Nothing else to change, so there’s no pop-up. You’re already done.
- Some text didn’t change. Check whether those text boxes use a slightly different font (a different weight or family can look nearly identical). Run Change all again from one of those boxes.
- An element won’t budge. Locked elements can’t be edited. Unlock them first, then try again.
Related: 10 Canva Fonts That Increase Blog Readability and Boost Conversions
FAQ: How to Change All Fonts in Canva
Can you change all fonts in Canva for free?
Yes. Both the Change all button and the Styles tab are available on a free Canva account. You only need Canva Pro if you want to upload your own custom fonts or save them in a Brand Kit.
How do I change the font on every page in Canva?
Use Change all. It replaces the font across every page of the design, not just the page you’re on. If you’re using the Styles tab instead, choose the option to apply it to all pages.
Does changing all fonts in Canva change the font size too?
No. Change all only swaps the font, and keeps your sizes, colours and spacing the same. Some fonts run bigger or smaller than others, though, so check for text that now overflows its box.
Key Takeaways
- Change one text box, then click “Change all” to replace that font across your whole Canva design.
- Use Design > Styles when you want new heading and body fonts applied together.
- Set your fonts in a Brand Kit once so every future design starts on-brand.
Your fonts shouldn’t be the reason a design takes an hour longer than it should. Now that you know how to change all fonts in Canva at once, you can fix a font choice in seconds, test a new look without starting over, and spend that time on what actually grows your blog. Pour yourself something spicy and go fix that carousel. 🍹






2 Responses
Great tips! I actually really love the fonts on Canva. I have a few that I use all the time.
Corinne x
https://skinnedcartree.com
This tip is so helpful, Candice! I had no idea you could do this!
Wishing you a wonderful week! 🙂